The Lonely Mountain

The Lonely Mountain

Tuesday 22 April 2014

Unused Smoke Tests...

Here are a couple of images from the different smoke tests I was doing for scene 2, which unfortunately didn't work out for the final cut. The problem was geting the smoke to move slowly enough to get the appropriate sense of scale. These give you an idea that it might have been nice but alas, a solution as yet has not shown itself to be! The final animation looks cool enough without it anyway...


Final Audio

So, we're pretty much at the end of the road here, for the sake of completion here is the final audio track with effects, music and of course, narration.


You'll need to watch the final video to see visuals and audio together afraid...

Monday 21 April 2014

Ink Reveal: Progression

Just a wee progression of the ink reveal using the diffuse ink layer and the sunlight layer.
After my last tests, Tom suggested I have the ink look more watery/blurry as it appeared and to add a sort of ink wave to enhance the unveiling of the drawn map elements.


Sunlight layer - no ink

Ink reveal using matte

Added effects to create more watery-ink reveal
With ink wave

Friday 18 April 2014

Credits sequence

Here is the credit sequence I put together in After Effects last week. It was good fun to do something a bit different for a change. Again, can't work out how to embed vimeo on blogger.

https://vimeo.com/92748399

Thursday 17 April 2014

The Rendering: As it should have looked (first time).

So after mucking up with the renders first time, they were finally done (with a lot of help/fixing from Kieran).

Just a few steps in the process.


Some of the layers (after being re-rendered).
AO


Depth


Eagle AO

                                                                        Eagle Translucence
                                                 

ID Pass

Subsurface Scatter

River Diffuse

Indirect

Sunlight


Eagle Rig

Just a quick and late post about the eagle rig:


Top view:

Bottom View:

Top View with joints:

Top View with an awkward test of the rig potential:

Side View with joints:

 Side View with a less awkward test of the rig potential:


Tuesday 15 April 2014

Shot 1 Animation

The animation I have been working on is in Shot 1. The Tree unravels as a hand, follows and shoots up through the flying eagle, as if to grab it. The eagle is knocked out and starts falling, before it transforms into a dragon and flies past the camera, sweeping to the next shot.

Tree-Hand animation:

Eagle fall and transform animation:

Dragon transform and sweep animation:

Here is a video with all the characters together. The eagle and dragon animation overlap to allow the compositors to blend between them for the transformation. I've put it on X-ray view so the eagle and dragon can still be seen. I also animated the camera for this shot:

I've also uploaded these playblasts to vimeo, the quality is slightly better to view over there instead of on blogger. The password for the videos is 'GoingLive':

All together, X-ray view: https://vimeo.com/92246470

- Lilly

Eagle flight animation, Sc1

Here's a playblast of my animation of the eagle flying at the start of scene 1. Sorry for the hyperlink, can't work out how to embed vimeo in blogger posts.

Monday 7 April 2014

Ink Reveal: Rendered Tests


So, After I managed to have a rendering malfunction on the scene and it had to be sent of for a re-render, I used some of the existing layers to try out the inky/water colour reveal on the (what should have been) final renders of the shot.


After making a couple of mattes for the reveal, I tested the scattered-reveal first.


This was a more of a sweeping-reveal and was the preferred version for the director.

Scene 3 Final Animation

Finished the animation on scene 3. Kieran has it rendering over night tonight, but here's a playblast.

https://vimeo.com/91326521

Thursday 3 April 2014

Hobbity Musak


Here is the first version of the soundtrack. sound effects still to come...

Wednesday 2 April 2014

Watercolour Reveal Tests


Here are a couple tests of the watercolour reveal in 3D.

The first one is the entire image sort of appearing from blackness. I don't think this is what was intended but I kind of liked it. It was also mentioned that there would be seconds of blackness in the beginning anyway, so maybe this could help fit the reveal in...just a thought really. This one is a little fast, but the speed can easily be changed.


The second is more like what I feel was expected from the reveal. The paper/ground would be present and then the text, lines and drawings of the map would appear in the watercolour style...(the idea is that the 3D will pop up into the scene so ignore that these elements are revealed in this too).


I could combine the both of these tests so that the paper could reveal and then afterwards the ink drawings and text on top, if this is preferred. Again, this is the first test using the same matte to reveal the elements, so there's plenty room for me to test this out a little further and do a bit of tweaking. (:

Tuesday 1 April 2014

Rigging the 'Tree-Hand' model

After finishing the 3D model of the Tree-Hand, it was onto the rigging. Treated the rigging as a normal human hand, with dual joints for better deformations. Made sure all the joints were orientated the same way:

Done a quick test once some of the joints were in place to check the fingers/branches were moving in the right direction:

Checking the joint orientations as I go:

All the joints in place and in the right hierarchy, next step was to Bind Skin of model to the joints:

Weight painting - came across a problem at first where weights I had just painted were being re-distributed when I moved onto another joint to weight paint, fixed the problem but locking the weights in the paint skin weights tool:

Continued painting skin weights:

Made sure the branches on the back of the hand only moved with the wrist joint so that they would still stand up fairly straight when the hand is first curled up and distorted:

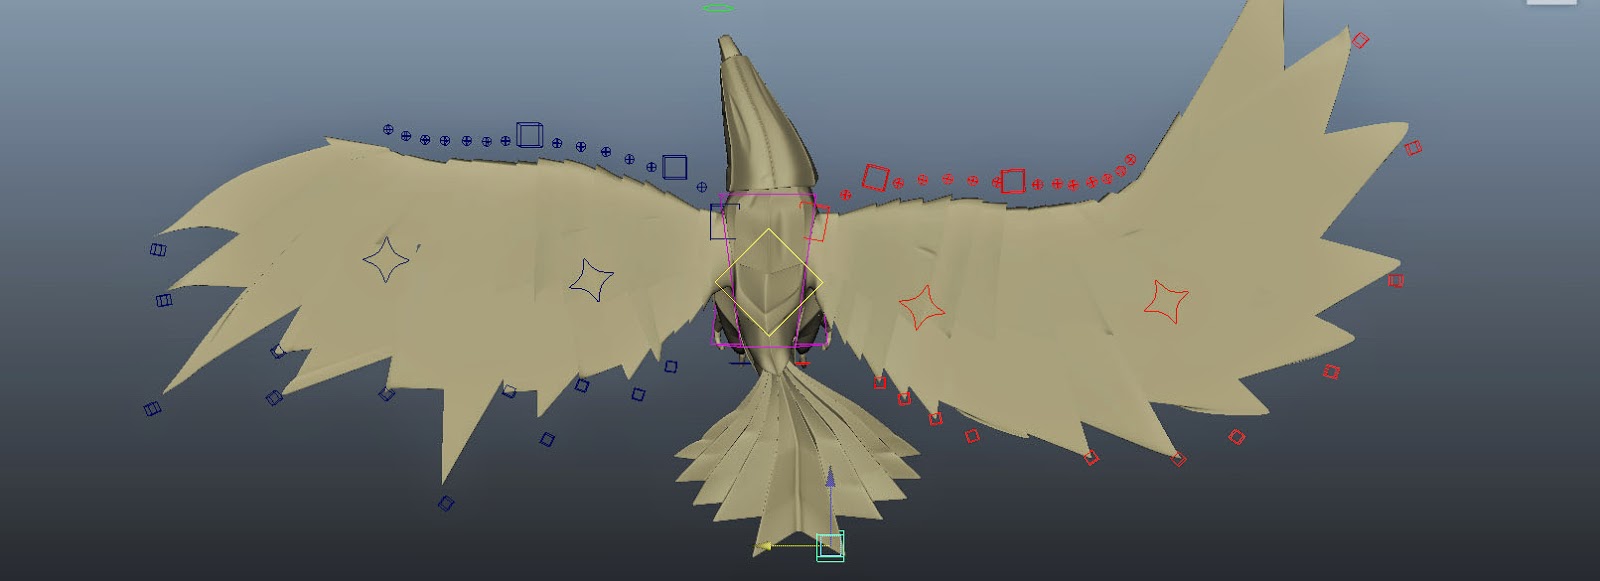
The next step was to add controls for the joints, I colour-coded them for each finger/branch to make selecting them less difficult to see:

 Testing out the finished rig and controls:

Last step was to add a Global Control, which allows the rig and model to be scaled, moved and rotated together when imported/referenced into a scene:


- Lilly

more red..

....less head movement and a different tail... also Toms new Rig... I swear this looks great from the right angle!